Thursday, December 20, 2018

SXA Pagination on a custom component

SXA Pagination component


The SXA pagination component adds a paging feature to your lists. Out of the box, it can work together with the (also out-of-the-box) PageList, FileList and EventList components. But what if you want this to work with your own component?

A custom paginable component


Sitecore StackExchange to the rescue! I found this nice answer https://sitecore.stackexchange.com/q/8105/237 that made me think it was going to be easy...

So for starters I have:
  • a controller with an action method
    (and a view with variants and such, but that is not in scope here - I've written another post if you want to know how to create our own rendering with variants)
  • a repository that gets items from the index (based on a Search scope.. might be my next post)
As I am getting too many items at once, I would like to add paging to this component. Preferably the out-of-the-box paging component (so I don't need to write it).

The answer on SSE indicated that a bit of configuration would do it.. but unfortunately it did not. My repository does not inherit from ListRepository (nor implements IListRepository) as that doesn't fit my needs. The steps I had to take:

Configuration in Sitecore

I'm not going to describe how to add your rendering to Sitecore and SXA - that is described in the official docs.

Your rendering does need rendering parameters. The rendering parameters temlate for your component should inherit IPaginable and IPagination (both from the Feature/Experience Accelerator/Page Content/Rendering Parameters folder).

This will give you the necessary parameters to make your component compatible with the pagination.

The parameters are described in the official docs on the pagination subject but your main focus is:
  • Page Size: the number of items on a page
  • List Signature: a string that will be used as signature - the same string needs to be entered in the rendering parameters of the pagination component to tell both renderings that they belong together. Note that this string will also appear in your querystring when paging..

The configuration mentioned in the SSE answer is now moved into the Sitecore item. So, on your rendering item you need to add IsPaginationEnabledRendering with a value true to the OtherProperties.


Changes to the repository

Our repository has a function GetModel to create the model for the controller. It actually calls VariantsRepository.FillBaseProperties and adds the items we fetch from the index to the model - the model inherits from VariantsRenderingModel.

This function needs an extra parameter of type IListPagination. This parameter will provide the Skip and PageSize information that we need to get the right page from the data. So this is the place where we reduce the full data set to the requested page.

Change to the controller

To be compatible with the Pagination component, our controller needs to derive from the PaginableController. We had to override 2 functions:

PaginationConfiguration

protected override IListPagination PaginationConfiguration
{
  get
    {
      var listPagination = ListPaginationContext.GetCurrent().Get(Rendering.Parameters["ListSignature"]);
      if (listPagination != null)
      {
        return listPagination;
      }

      var parameters = Rendering.Parameters;
      var scope = parameters["Scope"];
      return new ListPagination(parameters.ToDictionary(p => p.Key, p => p.Value), searchResultsRepository.GetItems(scope).Count());
    }
}
The first function to override is the one that get the PaginationConfiguration. The only changes made to the original function are the call to the repository - this needs an extra parameter in our case (and is not the default ListRepository as mentioned before).

Once this function is in place, use it to pass the PaginationConfiguration to the repository (GetModel - see above). At this point you should see that your component already can select the correct page from the data.


OnActionExecuting

We couldn't see any pagination yet though. To get that working, we needed to override one more function:
protected override void OnActionExecuting(ActionExecutingContext filterContext)
{
  if (ListPaginationContext.GetCurrent().Initialized)
  {
    return;
  }

  var paginationService = ServiceLocator.ServiceProvider.GetService<IPaginationService>();
  foreach (var sitecoreRendering in Sitecore.Mvc.Presentation.PageContext.Current.PageDefinition.Renderings.Where(r => paginationService.IsPaginationEnabledRendering(ID.Parse(r.RenderingItemPath))))
  {
    var scope = Rendering.Parameters["Scope"];
    var itemsCount = searchResultsRepository.GetItems(scope).Count();
    ListPagination listPagination;
    if (itemsCount <= 0)
    {
      var parameters = sitecoreRendering.Parameters;
      listPagination = new ListPagination(parameters.ToDictionary(p => p.Key, p => p.Value), searchResultsRepository.GetItems(scope).Count());
    }
    else
    {
      var parameters = sitecoreRendering.Parameters;
      listPagination = new ListPagination(parameters.ToDictionary(p => p.Key, p => p.Value), itemsCount);
    }

    IListPagination pagination = listPagination;
    if (!ListPaginationContext.GetCurrent().Contains(pagination))
    {
      ListPaginationContext.GetCurrent().Add(pagination);
    }
  }

  ListPaginationContext.GetCurrent().Initialized = true;
}
This function will initialize the Pagination Context. But again, by default it will use the ListRepository and we didn't have that one - so we had to override it and use our own repository.

Conclusion

It's no rocket science if you know how to do it.. :)

I did spend some time figuring this out - but next time it will go much much faster and I will have paging on my components in no time. And maybe with this guide you will too..

ps: using SXA 1.7.1 at time of writing

Monday, October 29, 2018

Sitecore 9.1 Forms - Prefilling fields & security

Sitecore 9.1 Forms

The Forms feature has 2 major new features in version 9.1 of the Sitecore platform. You'll get conditional fields and prefilling of fields. It's about that last one I wanted to give you a little bit of advice...

Prefilling fields

Without going into too much details (Sitecore 9.1 is only released in tech preview at the time of writing - release version will be available soon) the prefilling is based on value providers - classes that will get the values based on a parameter defined with the field. 
Prefilling is a nice feature, as it makes the user experience better and the conversion rate of the forms higher - visitors are lazy ;)

But.. before you jump into prefilling everything you think you know about me, read this article: https://www.campaignion.org/blog/all-you-have-know-about-pre-filling-forms

It is a good overview of what you can an can't do when prefilling forms. And there is one option related to Sitecore that I want to address.

Prefilling xConnext data

Sitecore environments usually have (a lot of) information about their visitors in the xDB database. It is very tempting to use that data to prefill the forms. But there might be catch..  

Consider the following scenario (which is not so far fetched) on a website:
  • a form with just an e-mail address to subscribe to the newsletter
  • a contact form (with email, name, address, ...)
  • all forms will identify the contact
  • all forms use prefilling on fields where possible (all ootb xXonnect fields)

So, what is the catch? Well, if I subscribe you (yes, you.. not me) to the newsletter and the system already knows you it will attach my session to your profile. No harm done, until I visit the contact form and see all your contact data. 

How do you prevent this? You probably want to keep the contact identifcation as that gives your marketers the information they want in the xConnect reports. Adding a Captcha to your form will help a bit (and this might be a good idea for other reasons as well). But actually, the only good solution is -as described in the mentioned post above- to only prefill data from a datastore (like xDB) when your user is really identified - meaning logged in or truly identified through an identifier in the querystring. 

Conclusion

Prefilling is a nice new feature (and it looks better than the WFFM version). And I hope the community will start sharing value providers. But be aware of what you do with your visitors data.. after all, you don't want to end up in a next version of Mikkel Rømer "white hat hackers" session.

Wednesday, October 24, 2018

What's new in SXA 1.8

In the very near future, SXA 1.8 will be available for all - together with Sitecore 9.1.
I had the privilege to take an early look and it looks good.  So ..

What's new?

I'll try to go over the new stuff, based on my notes from the Symposium session by Adam, things I heard in the community and the documention - and provide screenshots were possible.

Installation

Let's start in the beginning. The installation guide mentions "Sitecore Experience Platform 9.0 update 2 or 9.1" as prerequisite. So no Sitecore 8 anymore.. 

As the need to support Sitecore 8 limited the SXA team for certain features, this is a good evolution.

For a developer

  • Bootstrap 4

    This one was announced so no big news, but front-end people will still be very happy that this made the release. Bootstrap 4 comes as an extra option for the grid system - bootstrap 3 is also still available (probably for upgrade scenarios).
  • Link field best practices

    This is a Powershell script available on templates (folders) that will verify the source fields of the templates and suggest better options regarding multisite solutions (e.g. the use of the $site token).
    I must admit that when looking for this script, I found even more interesting (already existing) scripts that come with SXA. Nice...

  • Embedded renderings in rendering variants

    Personally I think this is one of the coolest new features in this version. When this was demoed in the Symposium session, quite some people apparently had no clue what to do with this. But it gives us even more options to get the renderings just the way we want them. Yes, no we can add a breadcrumb within a hero section filled with just page content... and our logic stays were it should be (in the breadcrumb component). I'm sure I will use this one! (to be honest, I already did try this on my preview-test environment and it works like a charm.. )
  • Adding modules

    On tenants and sites, we get scripts to add (missing) modules. Running the script will list all missing modules and you can install the selected ones.
    But, we can also do this the other way: adding a (new) module to multiple sites at once. On your module in /sitecore/System/Settings/Foundation/ or /sitecore/System/Settings/Feature/ you'll find the script. 
  • Custom html (views) per site

    The SXA components have their views, located in the Views folder. That remains the default and fallback location. But you can on each site define -on the Settings item- a CustomRenderingViewPath. This path can contain custom views for the renderings in that site. They need to use the same names and folders - if they do not exist the default is used (so you don't need to copy all views if you just want to change one of them).
    Just like the previous topic a nice feature for multi-site solutions.

For an editor

  • Defining the sections of the toolbox

    Up until version 1.7.1, the toolbox sections were determined by the paths in your renderings folder in the layouts section of Sitecore. This was not very user friendly as you want to group your renderings based on their feature (Helix...). That makes sense to the developers but not to the editors. We already had the "available renderings" section for each site but that wasn't used due to .. well, they had their reason in the early versions but that was gone now. So now we have the option to define the sections in the toolbox based on the available renderings. Note that by default the necessary checkbox (on the "available renderings" item in each site) is off.  As I asked for this one, I'm very happy to see it..
  • Updated editing modes

    The wireframe mode got a revamp and is looking quite a bit better. And a new mode was added: grayscale.
  • Highlighting partial designs

    When hovering over a partial design in the Partial Designs dropdown section in the Experience Editor the current partial design is shown in green border(s) in the editor. This makes it clear for editors where the partials are located and what they contain.
  • Cross site linking

    This might seem very trivial but in a multisite SXA environment it's not always so. You now get the option to set on each site what the "linkable" sites are.
    By default it is the current site only, but you can select all linkable sites or all linkable sites from the current tenant. To define a site as "linkable", you should mark the checkbox in your site's "settings/site grouping/site".


For visitors

WCAG 2.0 compatibility


Some additions were made for the accessibility compliance of SXA. On my test environment the "tab" key seemed to work, and I added the "skip" meta component:


Conclusion

I can be very short on this: it seems like a very nice version with some exciting features. And the upgrade guide is only 9 pages... :)

Monday, October 22, 2018

Using tokens in Sitecore SXA variant data attributes

Sitecore SXA variant definitions


Variants are an important part of SXA. Although SXA is so much more, learning how to use these is rather crucial for anyone who want to create sites with SXA. If you need more information on this, a good place to start are these official docs:
You can do a lot with these variants. Especially when you discover the power of the "Reference" in a variant definition, lots of scenario's become possible...  and there are some hidden gems. 

Our case

We had to create a rendering that displayed blocks of content - so far no problem, this is just displaying fields from a list of items. But the editor had to be able to set a background on each individual block (and some other properties). Short version: we had to be able to set a css class on every block. We could have asked our editors to create a rendering for each block they needed and set parameters on that rendering, but as we had reasons not to do that.

So we started looking at the variant definitions options, tried a few things without luck and ended up asking help on Stack Exchange: https://sitecore.stackexchange.com/q/12806/237

As usual, the SXA dev team came to the rescue (- thx Dawid for this one) and showed me a little hidden gem.

Using tokens in data attributes

Apparently you can use some tokens in the data attrbutes that are available in each part of the variant definition. As shown in the answer on SSE, we can use "class" as data attribute and fill that with a value from a field on the current item by using the $(fieldName) notation.

This means we can use a Reference in our variant to loop over a set of items, and for each of those items render a section (e.g. "div") with a class on it. That'll do it..

But.. we had one small issue. The default implementation will work with text fields. But for link-type fields it will generate a link to the target item. We don't want our editors to type values for fields like this - it should be a selection. So we got a patch from Support that extended this functionality to ValueLookupFields to fetch the value.

Now we could give our editors a dropdown selection of styles and use those in our variant. That's what we needed! (as soon as the site goes live, I can add a screenshot of the result)

I had a look at what Support provided for us and although it is not designed to be expanded easily, we can do even more with this (and so we did).

public class RenderSection : Sitecore.XA.Foundation.RenderingVariants.Pipelines.RenderVariantField.RenderSection
{
 protected override string GetAttributeTokenValue(string fieldName, Item item)
 {
   Field field = item.Fields[fieldName];
   if (field == null)
  return string.Empty;
   ....
   return base.GetAttributeTokenValue(fieldName, item);
 }
}
<sitecore>
    <pipelines>
      <renderVariantField>
        <processor patch:instead="*[@type='Sitecore.XA.Foundation.RenderingVariants.Pipelines.RenderVariantField.RenderSection, Sitecore.XA.Foundation.RenderingVariants']" type="Sitecore.Support.XA.Foundation.RenderingVariants.Pipelines.RenderVariantField.RenderSection, Sitecore.Support.00000" resolve="true" />
      </renderVariantField>
    </pipelines>
</sitecore>

We noticed they had overwritten the function that handles the tokens in case of a variant section (if you want this to work on other variant options like text or field, you need to overwrite those too). Where Sitecore/SXA is designed to be extended, they usually make it easier for us :)

So as mentioned, it is not (yet) designed to be expanded but it can. You could write any logic you want in the above funtion based on the "fieldName" (which propable doesn't even need to be an existing field name).

This opens a new set of possibilities to render everything we need with SXA variants!

Just one little request for a future version:  make this easier to extend.. ;)

Wednesday, August 8, 2018

Sitecore SXA, rules engine & containers in partial designs

SXA and partial designs

While working on a Sitecore site with SXA I created several partial designs (as you should when working with SXA). What a partial design is, and how it is used to create page designs that define the layout of your pages in SXA can be read in the official docs.

What you should know about partial designs is that you edit them on the partial design item itself, not on the pages where they are used. On the final page in the experience editor, you can edit the content shown by the partial design but you cannot change the design itself (add, remove or change components or their properties). Still, partial designs are very useful and help you keep the number of components on a page reasonable. On many occasions though, you will want the editors to be able to add components to the page that are not preset in the partial design. This can be done by adding a "container" component in the partial design (note: this is one way - not necessarily the way) on the spot where you want to give the editors a new placeholder (a placeholder is a spot where new components can be added). And so we did...

And then came the designers... and they gave our pages a very nice design. But they had a problem: empty containers!

The containers that were added to the partial design might remain empty. And with our design, this made it hard for the designers to get the required result. So: lets remove those empty containers.

SXA & the Container component

As mentioned, the container component was just added to have a placeholder available. It's a typical "structure" component that adds a wrapper for other renderings.

In the experience editor we want the placeholder to be always available (to be able to add components) but in normal or preview mode we want it gone when no renderings were added. 

The container component generates a placeholder named "container-x" where x is a dynamic placeholder id. 
Hint: when using the container, you should also set the placeholder restrictions for the generated placeholders - as you should do always probably ;)  More info on how to do this with SXA can be found on the official docs.
 To remove the components, I used the Sitecore rules engine. 

Using the rules engine

We want to use conditional rendering to hide the component when the related placeholder is empty. The action to hide a rendering is out-of-the-box available, so we only need the "condition". 

In this condition, we first check the PageMode to make sure we are in normal or preview mode.

We could ask the administrator adding the rule and using our condition to pass the related placeholder as a parameter (the easy way) but we can actually retrieve it.  The rendering (container) has a parameter called DynamicPlaceholderID that contains the generated dynamic placeholder id. In our case we hard-coded the prefix "container-" but you might do something pretty with that as well.

Last thing to do is find out if there is a rendering on the page in that placeholder..  which can be done with a query on the renderings list. 

Let's wrap this up and show the code:
public class WhenPlaceholderIsEmpty<T> : WhenCondition<T> where T : RuleContext
{
    protected override bool Execute(T ruleContext)
    {
        Assert.ArgumentNotNull(ruleContext, "ruleContext");
        if (!Sitecore.Context.PageMode.IsNormal && !Sitecore.Context.PageMode.IsPreview)
        {
            return false;
        }

 var conditionalRenderingsRuleContext = ruleContext as ConditionalRenderingsRuleContext;
        if (conditionalRenderingsRuleContext == null)
        {
            return false;
        }
  
        var dynamicPlaceholderId = HttpUtility.ParseQueryString(conditionalRenderingsRuleContext.Reference.Settings.Parameters).Get("DynamicPlaceholderID");
        if (dynamicPlaceholderId == null)
 {
            return false;
        }

        if (conditionalRenderingsRuleContext.Item.Visualization.GetRenderings(Sitecore.Context.Device, false)
            .ToList().Any(r => r.Placeholder.EndsWith("container-" + dynamicPlaceholderId, StringComparison.OrdinalIgnoreCase)))
        {
            return false;
        }

        return true;
    }
}

To quickly add this to condition to Sitecore, go to /sitecore/system/Settings/Rules/Definitions/Elements and create a new Element Folder.  In the created folder find tags/default and select Conditional Renderings as tag. In the root of the created element folder, add a new Condition. Fill in the Text like "when the placeholder in the container is empty" and add the Type (referal to the class above). Don't forget to publish the created items ;)

Personalization

Go to a partial design that contains a Container rendering. Open the presentation details (in content editor - you might also use the experience editor) and edit the controls. Use the personalization feature on the Container rendering and add a personalization rule using the newly created condition and the standard available "hide" action.  Save & publish.


Conclusion

Partial designs are a great way to organize your pages in SXA. And yes, they do put have some limitations. But it wouldn't be Sitecore if there was no way to do something about that and the rules engine is a rather powerful tool to help you achieve what is needed.

Monday, July 23, 2018

Overview pages with SXA search components

Sitecore SXA search components

Sitecore eXperience Accelerator comes with a bunch of components to create a search solution for your site. A few years ago -with SXA 1.1- I wrote a post on (some) of the search components and how to use them to create a site search. 

It wouldn't be Sitecore nor SXA when you could not tweak this a lot.. you can create specific searches, facetted results, and lots more..  Just check out the official docs.

When I found out that we can trigger the search results without user interaction I saw new possibilities.  We can create overview pages with the search components! This is no rocket science but probably worth sharing for people who are not so acquainted with SXA yet.


Create an overview page with SXA search components

Let's explain our setting: we have a number of products and want to create a page where the visitor can easily find the product (s) needs. We'll show the products and let them be filtered based on a few facets in order to get the visitor quickly to the wanted products with a link to the details.

So we have items of a template "Product" that are located in folders underneath our "product root node". 

Search scope

First thing to do is define our search scope. A search scope is used to limit the search results based on a query. Go to /Settings/Scopes in your sites folder to define a scope. In our case we created a Product Scope with a query on location (our product root node) and template (our product template). Use the "Build Query" dialog to create the query you need (the dialog performs the actual query so can preview the results). 


Search results

We can already create the search results to see if our listing is working. Select a page (or partial design) where you want the overview. Go to the experience editor and from the SXA toolbox drop the Search Results component on the page. 

The datasource of the search component is not really important here. This item contains the "Results not found" text, but we should always have results. 

What is important though are the properties of the control in the SearchCriteria section.
Make sure to:
  • select the scope (your created scope should be available here)
  • select "Automatically fire search when no criteria set" - this will make sure that your search is done automatically on the page


Variant
You'll probably want to create a variant for your search results. Create a new variant definition under /Presentation/Rendering Variants/Search Results in your site and select the variant on your search results component. In this variant you can define which fields (from the Product template) should be shown. Don't forget to set "Is Link" on at least one (the title) to have a link to the detail page.
More information on creating a variant on the official doc site.


More...
You can extend your page with more search components as needed. You'll probably want the "Page Selector" and "Page Size" components, maybe also the "Sort Results"..    More info on the available components for search can be found on the official doc site.

Facets

Next step is to add our facets to have filters on the results. Our template contains a few fields that we want to filter on. In our case those fields were of type DropList. This means that the raw value of the field is actually just a Guid. Of course, you don't want to display guids to your visitors..  so we had to add extra fields to our index to do this. 

Facet index field
It's been asked on StackExchange, but the information can be found on the official doc site. And yes, it's as simple as adding a few definitions for computed fields (not even code, as the code has been provided by SXA).

To be able to create the facet to a field that has a guid, add the following in a config patch file (check the config file for your search provider for the exact location where to patch this):
<field contentfield="title" fieldname="referenced" referencefield="link" type="Sitecore.XA.Foundation.Search.ComputedFields.ResolvedLinks, Sitecore.XA.Foundation.Search"></field>
where:
  • fieldName: defines the index field name
  • referenceField: name of the field in your template
  • contentField: name of the field to be fetched from the referenced item
Don't forget to rebuild your index after these changes...

Once we have the field in our index, we can create the facet in SXA.

SXA Facet
We will use facets to refine the search results. Facets in SXA are added to /Settings/Facets in your site. 

There are a few facet types (bool, date, integer, list ...) - we used list types in our case. It might be a bit tricky to get the "Field Name" field correctly as this has to be like in your index. Easiest way to be sure is to check your index (e.g. use the Solr admin interface) to find the exact field name in the index. In my case it was "fieldName_sm" (where fieldName is the one from our patch above). 

Adding the facets to the page
Last thing we need to do is add the facet components to our page, using the created facet settings.
Go back to the page (item) where you added the search results and open it again in the experience editor.

For each facet you have, add the Filter component you want. I used Dropdown and Checklist, but this will depend on what you actually want to filter on and how you want to present it to the visitor. 

When the component is dropped on the page, create a new datasource for it. In this datasource item, you can alter a few texts used on the component but the most important one is the Facet field. Select the appropriate facet here.

The results

When all this is done and published, you should have a nice overview page that has filters, paging, .. and everything you need to get your visitors to your detail pages. Good luck!

Extra

You will notice that filtering the results creates a new url each time. This means we could immediatly link to a filtered version of our page if we would want to...


ps: we are using SXA 1.7.1 at the time of writing

Tuesday, July 3, 2018

Sitecore admin page in 9.0.2

Sitecore admin pages

Most Sitecore developers will probably know that Sitecore has some admin pages in /sitecore/admin.
Jammykam wrote a very good overview on it in 2016 as we did get an overview page of the admin tools in v8.1.

Sitecore admin pages in 9.0.2


Recently I installed the (now) latest version of Sitecore, 9.0.2. The admin tools are still there, but wow.. they did get an update. The page went from looks-like-this-is-made-by-a-developer to something that fits in the admin interface of Sitecore.


As you can see there are also a few new additions. I won't go over the existing ones (they have been explained in the aformentioned blog by Kamruz or also here by Kris).

New additions

One that was added with Sitecore 9 already was the extended show config:: Show Config Layers. It will bring you to /sitecore/admin/ShowConfigLayers.aspx and allows you to see your configuration based on layers and roles. Would have been nice if environments were able as well, but haven't found that yet.


But the one I really wanted to mention, is a new and very cool one: the Support Package generator.  Yes, no need to install this anymore - you can generate your support packages from the admin section of the site now! Very nice, and always up to date. Available at /sitecore/admin/supportpackage.


Friday, May 11, 2018

Sitecore context language based on Geo IP location

Sitecore context language


Sitecore uses a context language (Sitecore.Context.Language) to fetch the correct version of an item to display. There is an out-of-the-box logic to determine the context language - it uses:
  1. The "sc_lang" query string parameter
  2. The language prefix in the url
  3. The language cookie for the site
  4. The default language in the site config.
  5. The DefaultLanguage setting in the Sitecore config
There are many other functional scenario's to determine the language of a (new) visitor and they can be developed in a custom processor that is placed in the httpRequestBegin pipeline. Create a class that overrides HttpRequestProcessor, implement an override for the Process method containing any logic you need and adapt the Sitecore Context properties (Language) as needed.

What if you want visitors to be directed to a language based on their location?

Geo IP detection

In Sitecore you can setup Geo IP location detection. This will add information to the Tracker about the location of your visitor. This information can be used for several purposes, and possibly also for language detection.

Geo IP to set the context language

We had to set the language of the new visitor to en-US when the visitor came from the USA.
As we had languages enabled in the urls, we only had to take care of the homepage - all other urls had a defined language already.

Seems so easy! Just create the language resolver as mentioned above and set the language based on the country in the tracker. Done.

Issue 1 : the tracker

If you place your language resolver where you normally would (just after the one from Sitecore) you'll notice that your tracker is not yet initialized. This is normal. If you want more information on the complete pipeline sequence in a request, you should read Martin Davies' blog
Solution: put your resolver elsewhere..  :
<startAnalytics>
   <processor patch:after="*[@type='Sitecore.Analytics.Pipelines.StartAnalytics.StartTracking, Sitecore.Analytics']" type="your-language-resolver, .." />
</startAnalytics>
As this is another pipeline, we'll also use another base class: my processor derives from RenderLayoutProcessor - the rest stays the same.

Issue 2: the Geo IP

On the first visit, you are most likely to find no geo ip data in the request pipeline. It's just too soon. The request has been made (async), but the results are not there yet. An article by Pavel Veller got us in the right direction. A new CreateVisitProcessor was made:
public class UpdateGeoIpData : CreateVisitProcessor
{
    public override void Process(CreateVisitArgs args)
    {
        var url = WebUtil.GetRawUrl();
        if (!url.Equals("/", StringComparison.OrdinalIgnoreCase))
        {
            return;
        }

        args.Interaction.UpdateGeoIpData(TimeSpan.FromMilliseconds(500));
    }
}

<pipelines>
    <createVisit>
        <processor type="Sitecore.Analytics.Pipelines.CreateVisits.UpdateGeoIpData, Sitecore.Analytics">
          <patch:delete/>
        </processor>
        <processor type="...UpdateGeoIpData, .." patch:after="processor[@type='Sitecore.Analytics.Pipelines.CreateVisits.XForwardedFor, Sitecore.Analytics']" />
    </createVisit>
</pipelines>

This will make sure that we wait a little longer, but only on the pages where needed.

Resolving

if (Tracker.Current.Interaction.HasGeoIpData)
{
    if (Tracker.Current.Interaction.GeoData.Country.Equals("US", StringComparison.OrdinalIgnoreCase))
    {
        return "en-US";
    }
}

Our final logic looked something as above. We test the country from the GeoData and handle accordingly.

For the moment we are running some performance tests, but so far it seems ok.

Monday, April 30, 2018

SUGCON 2018 - Sitecore User group conference in Berlin


The Sitecore User Group Conference (SUGCON) is getting bigger and better every year. The 2018 edition in Berlin was definitely a success. The sessions were great. We had plenty of good food and drinks - not enough tables but that made us join and meet new people (or bump into old acquaintances) which brings me to the most important part, the attendees: 600 awesome Sitecore community people that make this conference to the annual high mass for all Sitecore users, developers, marketers, .... With a 'little' help of an amazing group of organizers (also community people) who did a tremendous job putting this all together.
A warm applause for the community and a big thanks for the organizers!

Day 1 sessions


Day 1 started with an opening keynote, highlighting three community pilars (Sitecore community forum - Sitecore Slack - Sitecore StackExchange) and a surprise announcement on Sitecore's release cadence. From now on Sitecore will release:

  • a "Software release" twice a year with new features
  • "Update releases" with fixes but no breaking changes when needed. 


Jason Wilkerson and Richard Seal got the conference really started with a trip to "SitecoreLand". A fictive amusement park with bracelets, fast lanes, and a Sitecore driven website and mobile app. They used the whole Sitecore spectrum: SXA (Sitecore Experience Accelerator), Sitecore Commerce, Marketing automation and xConnect with a special sauce of IoT (Internet of Things) to accomplish a proof of concept for an all-in customer experience. It was a call to all of us to dream.. to use our imagination..  because lots of things are possible.

Kam Figy went on stage to show us "Uber-modern API's for Sitecore". The rabbit out of his hat (can a Unicorn wear a hat?) was called GraphQL. This is all still in preview, but the demo's were cool (and working). He showed the graph browser, an alternative database browser and the integration in JSS. It was amazing, overwhelming, cool, and a little bit "wtf".. (but javascript is not my usual playground).


Next on stage was Alexei Veshalovich. He showed us an omni-channel demo for an unrecognizable car brand using (amongst others) Outlook Plugin, Xamarin, and from the Sitecore platform JSS, ExM, xConnect and the Marketing automation engine. And still no angry demo gods :)

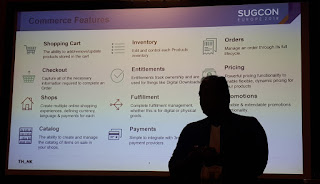
My next session was Commerce minded: Sumith Damodaran presented the architecture of the new Sitecore Commerce 9 platform with an emphasis on plugins.
We learned about inventory sets and sellable items, the storage roles and the application roles like Shops, Authoring and Minions. Commerce Plugins are a (or the) way to extend and enhance the solution, knowing that the product itself also implements it's core features via plugins. And a final note on SXA Storefront for building B2C e-commerce solutions using Sitecore Experience Accelerator.

Evening entertainment

Sugcon is also the place where the award ceremony for the Sitecore Hackathon and the MVP's take place.

For the first time the hackathon results were not announced up front, so the tension with the participants was a little higher when Akshay Sura presented the winners. As our team had to withdraw due to illness 😞 we didn't renew our title but we're still proud to see our name -No Weekend 4 Us- on the slide with past winners. But: congratulations to all 2018 winners! We know they did an amazing job. And thanks to Akshay and all judges for investing their time to make this happen!


During the MVP ceremony the many mvp's, who spend quite some time making the Sitecore community as good as it is, are being celebrated and their physical award is handed out. And of course, this is picture time.

The entertainment this year was a "Community Feud" with Akshay Sura and Robin Hermanussen as show hosts and Pete Navarra and Jason St-Cyr as team captains.
It was fun.. and our team (with Pete as captain) won - the prize money was donated to the non-profit Girls in Tech. The questions and answers were based upon a questionaire filled in by community members some time ago. "What drink would Pieter Brinkman and Mark Frost have in a pub?" - I think Pete learned that we have quite some trolls, as "water" was a top answer 🙊


Day 2 sessions

Day 2 started with two Honorary MVP's (Todd Mitchell & Lars Petersen) showing us the power of connected data - how to bring all sorts of data in xDB through xConnect and get it out again in a meaningful way. Amongst others they used a calculated facet as a way to capture data instead of keeping and counting a number of events.

For my next session I had the heartbreaking choice between the "EXM Live!" session by the magnificant Pete Navarra or the xConnect evolution by xDB guru Dmytro Shevchenko.

I decided to go for Dmytro and the underlying mechanics of Sitecore's new scalable architecture. This means I will have to watch Pete in Orlando ;) The xConnect session was interesting and a good follow-up of the session of last year. The differences between the locking mechanism in Sitecore 8 and 9 was explained - we went from pessimistic to optimistic - and code was shown to handle this. We're looking forward to Dmytro's posts on this ;)

Thomas Eldblom went on the main stage to give his last session as Sitecore employee (as we would learn later 😞).  
Using SIF -the Sitecore Install Framework- live on stage installing several Sitecore architectures might be a challenge but he was well prepared and the demo's went very smooth. He showed the different setups provided by Sitecore and how to tweak SIF to install the ones that are not out-of-the-box. Even installing modules like the Publishing Service can be done with SIF.

As I missed Mark Stiles' session on cognitive services last year, I decided to join it now. It was a good overview of what companies like Google and Microsoft are offering on AI and how this can be leveraged. It made me curious to see where this is going:

I don't think Mikkel Rømer expected so many people in his "White hat hacker's guide to the internet". The break-out room was fully packed and heard that he tested 3K+ Sitecore sites on some known issues like the Telerik and the PushSession vulnerabilities and faulty configurations like open logins with or without the default password. As the results were quite astonishing - meaning too many sites were not ok - this was an eye opener for a lot of people. Patch your solutions! Read and act by the hardening guides! And to be honest, I'm not sure if I was worried most by his results or by the questions afterwards as some of those made clear there is still a lot of work to make all developers aware of security risks... 

Up to George Chang to give us some thoughts on Identity in Sitecore 9.
The new Federated Authentication feature in Sitecore 9 looks very good. I already read some blog posts on it and this session confirmed my feelings. Quite sure I will be trying this one out in the near future.


Back to the the main stage for two well-known community trolls telling us the story behind the new Forms: Kamruz Jaman and Mike Reynolds (or was it Reybolds?). I must admit I had expected a bit more customizations and code but that might be because I already saw quite a bit about Forms already (and presented a session on this topic myself on the local user group). But the session was a good overview of the features, the possibilities and the missing pieces of a Sitecore module that a lot of users have been waiting for. And.. they managed to get all of us on Slack -during the session (so I might have missed a bit)- by posting Forms data on Slack:

The last session slot was for Sitecore's X-team -represented by Alex Shyba & Adam Weber- to demonstrate the current status of the Sitecore Javascript Services (JSS). Heavy stuff after 2 days of conference...


Pieter Brinkman had the honour to close the conference and announce the next Sugcon Europe: mark April 4th/5th 2019 in your agenda and start learning English because the community is going to London (in Brexit-country).


Final thoughts

Sugcon is truly the place and time to meet all those wonderful community members you got to know online in real life. Have a chat with the guy (or girl) who helped you solve an issue, or vice versa. Meet the people behind the modules you might be using. Sadly -as I am used to arriving the evening before the conference and leaving right after- it's too short to meet you all so I surely missed quite a few people. Let's catch up in Orlando ;)  

But still it was good to see some old and new prominent SSE folks (good to wear your 5K-shirt, Chris), people I've worked with in the past, people I will work with in the near future... many known faces from Belgium (SugBelux), and (un)known faces from all around the globe.

Thanks to all organizers for creating this opportunity for the tremendous Sitecore community to meet and learn in person. Hey, we are omni-channel! 


Tuesday, March 6, 2018

Sitecore 9 configuration roles: content management, reporting, processing

Sitecore 9 configuration roles

A while ago I had to setup a few Sitecore servers with a topology as:
  • Content Delivery
  • Content Management (and all the rest)
In Sitecore 9 things have changed a little bit when setting up server roles. As we could read in the documention we have these roles at our disposal:
  • ContentDelivery
  • ContentManagement
  • Processing
  • Reporting
  • Standalone
For our CD server, the choice was easy: we set the server to the ContentDelivery role.
For our CM server, it was not that obvious. As the documentation mentioned combining roles is possible and it even mentions "ContentManagement, Processing, Reporting" as an example we though this would be a good idea. 

ContentManagement, Processing, Reporting

Unfortunately immediately after setting these roles, the server crashed. We noticed that we had to set remote settings for processing and reporting server which seemed very weird as our processing and reporting was not remote. 

I ended up asking this on SSE and also to Sitecore Support. Support logged this as a bug and gave us the solution - details on this can be found on SSE, so no need to copy them here.

With these changes, we had no need to set any remote settings. And the site worked!

But a few wise men asked me: "why are you doing this?". The only answer I had at that time was: "because I can"..  which is maybe not the best answer when explaining a server setup :)


Standalone

Before Sitecore 9 and the configuration roles we would have had a setup for this CM server that is now similar to a Standalone. Because that was easy. And disabling and enabling files was not...

So why not use standalone role now? Well, we assumed that as this server is not a content delivery one we would benefit from defining the roles. But just assuming is as wicked as using roles just because you can...

Compare configs

So let's compare the resulting configs.

There were quite some differences actually. I won't go into all the details as that is probably just boring but let's focus on some main points: [SO = standalone, CMPR = ContentManagement,Processing,Reporting]
  • databases: in a SO setup, core and master are set as default databases, in a CMPR setup these are all set to web
  • tracking: in a CMPR setup entries are removed regarding RobotDetection, form dropouts, session commits, content testing,..  
  • EXM: a lot of entries removed in CMPR, especially on tracking
So without going into details, I would assume that when not running in Standalone the website running on the ContentManagement server might not be doing your tracking and testing correctly and if entrying from a mail you'll also miss out.

But.. is this important? Will it make the server more performant? 
I think not. 

So what do you need to do? Well, you have a choice..  Also consider if you are using the server as a true test environment (using an extra publishing target perhaps) you probably do want ContentDelivery enabled, meaning a standalone setup.

The easy choice is: set it to standalone.
But.. if you would have separate Processing and/or Reporting roles, would you add ContentDelivery as a role to the ContentManagement server? Probably/maybe not.. so why do that when those roles get combined?

Because it's easy... :)

via GIPHY

Wednesday, February 7, 2018

Displaying extra data on a Sitecore 9 Goal

Goals in Sitecore 9

In our project we had goals set when a whitepaper was downloaded. This works fine, but it would be much nicer if we could show which whitepaper was actually downloaded. All the whitepapers have an identifier code, so the challenge was to add this identifier to the goal data.

Capturing custom goal data

Capturing the data is very well explained in the official documentation of Sitecore. We used the "Data" and "DataKey" properties of the goal:
  • DataKey: a key that identifies the contents of  "Data" - e.g. 'Whitepaper code'
  • Data : any data collected as part of triggering the event - in our case the whitepaper identifier
This all works fine and we can see the data in the database (xDB shards) as part of the events.

Displaying custom goal data

Data is nice, but you need a way to show it. It wasn't immediatly clear how to do this, so I asked it on Sitecore Stack Exchange.
Jarmo Jarvi pointed me in the good direction by mentioning a tremendous blog post by Jonathan Robbins. The blog post was based on Sitecore 8 - the idea behind my post here is to show the differences when doing this in Sitecore 9 and xConnect. The result will be the same:
an extra column in the goals section of the activity tab of a contact in the Experience Profile

ExperienceProfileContactViews

The ExperienceProfileContactViews pipeline is where all the magic happens. Adding the extra column to the results table is identical to the description for Sitecore 8. Fetching the data (in GetGoals) however is quite different as we have to use xConnect now:
public class AddGoalDataColumn : ReportProcessorBase
{
  public override void Process(ReportProcessorArgs args)
  {
    args.ResultTableForView?.Columns.Add(Schema.GoalData.ToColumn());
  }
}

public static class Schema
{
  public static ViewField GoalData = new ViewField("GoalData");
}

public class FillGoalData : ReportProcessorBase
{
  public override void Process(ReportProcessorArgs args)
  {
    var resultTableForView = args.ResultTableForView;
    Assert.IsNotNull(resultTableForView, "Result table for {0} could not be found.", args.ReportParameters.ViewName);
    var i = 0;
    foreach (var row in resultTableForView.AsEnumerable())
    {
      var goalData = args.QueryResult.Rows[i].ItemArray[4];
      if (goalData != null)
      {
        row[Schema.GoalData.Name] = goalData;
      }

      i++;
    }
  }
}
public class GetGoals : ReportProcessorBase
{
  public override void Process(ReportProcessorArgs args)
  {
    var goalsDataXconnect = GetGoalsDataXconnect(args.ReportParameters.ContactId);
    args.QueryResult = goalsDataXconnect;
  }

  private static DataTable GetGoalsDataXconnect(Guid contactId)
  {
    var goalsTableWithSchema = CreateGoalsTableWithSchema();
    var contactExpandOptions = new ContactExpandOptions(Array.Empty<string>())
    {
      Interactions = new RelatedInteractionsExpandOptions("WebVisit")
      {
        StartDateTime = DateTime.MinValue
      }
    };

    FillRawTable(GetContactByOptions(contactId, contactExpandOptions).Interactions.Where(p => p.Events.OfType<Goal>().Any()), goalsTableWithSchema);
    return goalsTableWithSchema;
  }

  private static DataTable CreateGoalsTableWithSchema()
  {
    var dataTable = new DataTable();
    dataTable.Columns.AddRange(new[]
    {
      new DataColumn("_id", typeof(Guid)),
      new DataColumn("ContactId", typeof(Guid)),
      new DataColumn("Pages_PageEvents_PageEventDefinitionId", typeof(Guid)),
      new DataColumn("Pages_PageEvents_DateTime", typeof(DateTime)),
      new DataColumn("Pages_PageEvents_Data", typeof(string)),
      new DataColumn("Pages_Url_Path", typeof(string)),
      new DataColumn("Pages_Url_QueryString", typeof(string)),
      new DataColumn("Pages_PageEvents_Value", typeof(int)),
      new DataColumn("Pages_Item__id", typeof(Guid)),
      new DataColumn("SiteName", typeof(string))
    });

    return dataTable;
  }

  private static void FillRawTable(IEnumerable<Interaction> goalsInteractions, DataTable rawTable)
  {
    foreach (var goalsInteraction in goalsInteractions)
    {
      foreach (var goal in goalsInteraction.Events.OfType<Goal>())
      {
        var currentEvent = goal;
        var row = rawTable.NewRow();
        row["_id"] = goalsInteraction.Id;
        row["ContactId"] = goalsInteraction.Contact.Id;
        row["Pages_PageEvents_PageEventDefinitionId"] = currentEvent.DefinitionId;
        row["Pages_PageEvents_DateTime"] = currentEvent.Timestamp;
        row["Pages_PageEvents_Data"] = currentEvent.Data;
        row["Pages_PageEvents_Value"] = currentEvent.EngagementValue;
        var dataRow = row;
        const string index = "SiteName";
        var webVisit = goalsInteraction.WebVisit();
        var str = webVisit?.SiteName ?? string.Empty;
        dataRow[index] = str;
        if (currentEvent.ParentEventId.HasValue)
        {
          if (goalsInteraction.Events.FirstOrDefault(p => p.Id == currentEvent.ParentEventId.Value) is PageViewEvent pageViewEvent)
          {
            row["Pages_Item__id"] = pageViewEvent.ItemId;
            var urlString = new UrlString(pageViewEvent.Url);
            row["Pages_Url_Path"] = urlString.Path;
            row["Pages_Url_QueryString"] = urlString.Query;
          }
        }

        rawTable.Rows.Add(row);
      }
    }
  }

  private static Contact GetContactByOptions(Guid contactId, ExpandOptions options = null)
  {
    using (var client = SitecoreXConnectClientConfiguration.GetClient())
    {
      if (options == null)
      {
        options = new ContactExpandOptions(Array.Empty<string>())
        {
          Interactions = new RelatedInteractionsExpandOptions("IpInfo", "WebVisit")
        };
      }

      var contactReference = new ContactReference(contactId);
      var contact = client.Get(contactReference, options);
      if (contact == null)
      {
        throw new ContactNotFoundException($"No Contact with id [{contactId}] found");
      }

      return contact;
    }
  }
}

One more change is the configuration. It is almost the same as in Sitecore 8, but we don't need to change the goals-query anymore - instead we have to patch the GetGoals in the same ExperienceProfileContactViews pipeline.
<sitecore>
  <pipelines>
    <group groupName="ExperienceProfileContactViews">
      <pipelines>
        <goals>
          <processor patch:after="*[@type='Sitecore.Cintel.Reporting.Contact.Goal.Processors.ConstructGoalsDataTable, Sitecore.Cintel']"
             type="MyNamespace.AddGoalDataColumn, MyProject" />
          <processor patch:after="*[@type='Sitecore.Cintel.Reporting.Contact.Goal.Processors.PopulateGoalsWithXdbData, Sitecore.Cintel']"
             type="MyNamespace.FillGoalData, MyProject" />
          <processor patch:instead="*[@type='Sitecore.Cintel.Reporting.ReportingServerDatasource.Goals.GetGoals, Sitecore.Cintel']"
             type="MyNamespace.GetGoals, MyProject" />
        </goals>
      </pipelines>
    </group>
  </pipelines>
</sitecore>

Final step - core database

As Jonathan mentioned, we do need to add a new item in the core database to display our new column in the list of Goals. Create this item under the path /sitecore/client/Applications/ExperienceProfile/Contact/PageSettings/Tabs/Activity/Activity Subtabs/Goals/GoalsPanel/Goals and set a descriptive HeaderText and a DataField value that matches the schema name.

Your result should look like this:


I woud like to thank Jonathan Robbins for his original blog post and Jarmo Jarvi for his answer on SSE.

Monday, February 5, 2018

Display custom contact facets in Sitecore 9 Experience Profile

Custom contact facets

Creating custom facets is something that pops up quite often when customers start using Sitecore xDB and contact data. Sitecore 9 changed lots of things for developers working with xDB. The new xConnect layer is a wonderfull thing but when upgrading to Sitecore 9, the odds that you will need to rewrite some/all your code regarding xDB are not looking good.

Although.. you might/should see this as an opportunity to re-think what has been implemented before.

I want to focus on one particular part in this post. We had some custom facets implemented. Doing this with xConnect in Sitecore 9 is well documented on the official Sitecore documentation site.

Experience Profile

But when you have custom facets you usually also want to display this information in the Experience Profile. We used to do this based on some blog post from Adam Conn and/or Jonathan Robbins.
When upgrading to Sitecore 9, we had to made some small changes to this code. Especially (and obviously) the part where we actually do a query to fetch the data from xDB.

Contact View pipeline

As you can read in the previously mentioned blog posts the contact view pipeline is where alle the magic happens in 3 steps:
  1. Creating a data structure to hold the results of the query
  2. Executing the query
  3. Populating the data structure with the results of the query
The part where our changes are located can be found in the execution phase. Our processor will be in a pipeline referred to by a build-in Sitecore processor:
<group groupName="ExperienceProfileContactDataSourceQueries">
  <pipelines>
    <my-custom-query>
      <processor type="MyNamespace.MyDataProcessor, MyNamespace" />
    </my-custom-query>
  </pipelines>
</group>

<group groupName="ExperienceProfileContactViews">
<pipelines>
  <demo>
    ...
    <processor type="Sitecore.Cintel.Reporting.Processors.ExecuteReportingServerDatasourceQuery, Sitecore.Cintel">
      <param desc="queryName">my-custom-query</param>
    </processor>
    ...
  </demo>
</pipelines>
</group>
Let's focus on getting the data.


Query Pipeline Processors

The query pipeline processor is the part that executes the query - gets the data. It is (still) a processor based on ReportProcessorBase.

We will be using the model that was created with the custom facet. For the example we have:
  • custom facet: "CustomFacet"
  • property "Company" in this facet (type string)
The code for MyNamespace.MyDataProcessor:

public override void Process(ReportProcessorArgs args)
{
  var table = CreateTableWithSchema();
  GetTableFromContact(table, args.ReportParameters.ContactId);
  args.QueryResult = table;
}

private static DataTable CreateTableWithSchema()
{
  var dataTable = new DataTable() { Locale = CultureInfo.InvariantCulture };
  dataTable.Columns.AddRange(new[]
  {
    new DataColumn(XConnectFields.Contact.Id, typeof(Guid)),
    new DataColumn("Custom_Company", typeof(string))
  });

  return dataTable;
}

private static void GetTableFromContact(DataTable rawTable, Guid contactId)
{
  string[] facets = { CustomFacet.DefaultFacetKey };
  var contact = GetContact(contactId, facets);
  var row = rawTable.NewRow();
  row[XConnectFields.Contact.Id] = contactId;

  if (contact.Facets.TryGetValue(CustomFacet.DefaultFacetKey, out var customFacet))
  {
    row["Custom_Company"] = ((CustomFacet)customFacet)?.Company;
  }

  rawTable.Rows.Add(row);
}

private static Contact GetContact(Guid contactId, string[] facets)
{
  using (var client = SitecoreXConnectClientConfiguration.GetClient())
  {
    var contactReference = new ContactReference(contactId);
    var contact = facets == null || facets.Length == 0 ? client.Get(contactReference, new ContactExpandOptions(Array.Empty<string>())) : client.Get(contactReference, new ContactExpandOptions(facets));
    if (contact == null)
    {
      throw new ContactNotFoundException(FormattableString.Invariant($"No Contact with id [{contactId}] found"));
    }
   
  return contact;
  }
}

When comparing this code to what we had in Sitecore 8, we have a bit more code but it all seems to make sense. Especially when  you get familiar with coding with xConnect.
What happens here in short:
  1. Create a dataTable
  2. Fetch the contact from xConnect with the necessary facet(s)
  3. Read the data from the contact and add it to the dataTable
  4. Set the dataTable in the pipeline arguments

Special thanks to Nico Geeroms who did the actual coding and testing on this one.